
Why install a heater in my Promaster
We bought our RAM Promaster Van in the beginning of 2024, it is a 2023 model. In order to get experience with camping in it, we temporarily installed a raised bed, kitchen island, lights, and a fridge to do some test runs camping.
Turned out out that while camping in New England during the spring, and fall: evening, night, and early morning temps can get pretty low.
Basically the only option was left was get to bed early, as it was just uncomfortable sitting in the van. When discussing this with some fellow campers, they let me experience there comfy vans with a heater running.
It did not take a lot of convincing to get a heater for our van. Unfortunately these heaters are not cheap, at least the gas-online based ones. There are some cheap chinese diesel heaters. With the Promaster being a gasoline based car, wanted to leverage the gas tank, instead of an additional space consuming diesel tank.
The installation looked pretty daunting, I thought about having it done by a pro installer, but after watching some youtube videos built up the courage to it do the install myself.
Choosing between Eberspacher and Webasto
When exploring the various heaters that were available, I saw some really cheap ones on Amazon, but there were diesel based. For gasoline based heaters I found two options: the Webasto and the Eberspacher heaters.
When I compared the two; the Webasto seems more established, but was older, and the Eberspacher seemed to be more efficient, was capable to operate at higher altitudes with its altitude sensor, and seemed to have an easier install procedure.
Hence I went for the Eberspacher.
Eberspacher features
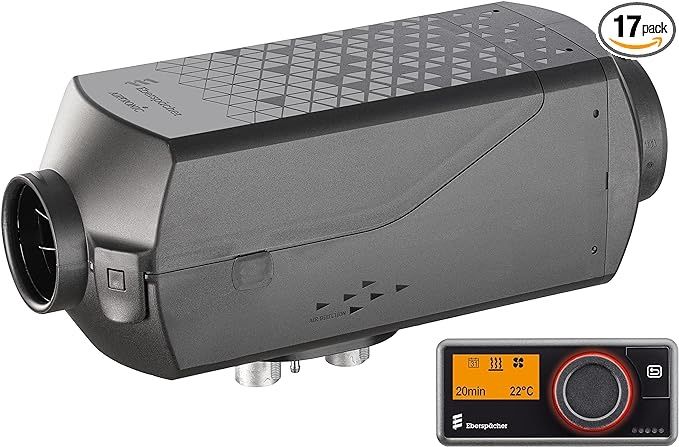
The Eberspacher Airtronic Heater Kit AS3 B2L has a 2kW / 6824 BTU output, this should be enough to heat an insulated Promaster of 100 square feet (I have the 18 feet long wheel base).
The Eberspacher B2L is engineered to operate in extreme conditions and high altitudes.
It can operate in temperatures as low as -46°C / - 50°F and at altitudes of up to 18K feet. This is possible thanks to its integrated altitude sensor, and unlike earlier models there is no additional wiring or installation required for high altitude operation.
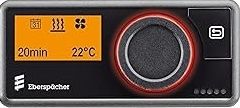
The heater comes with the Easy start controller.
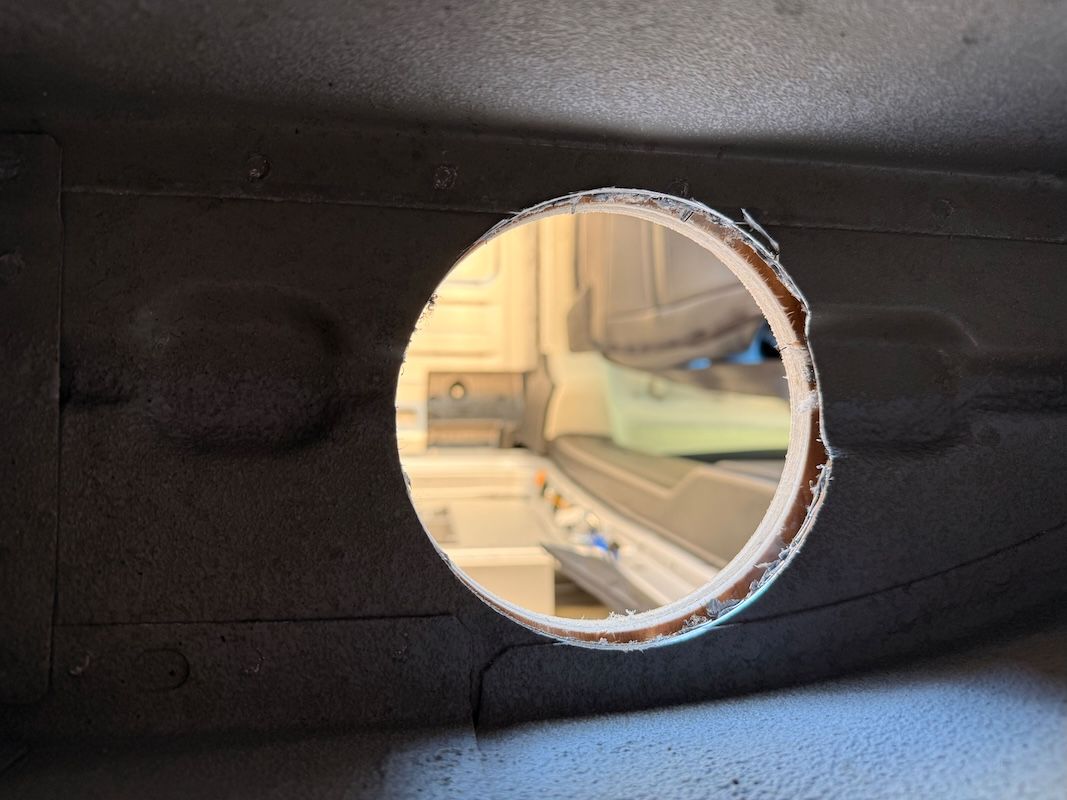
Cut a 5" hole in the floor
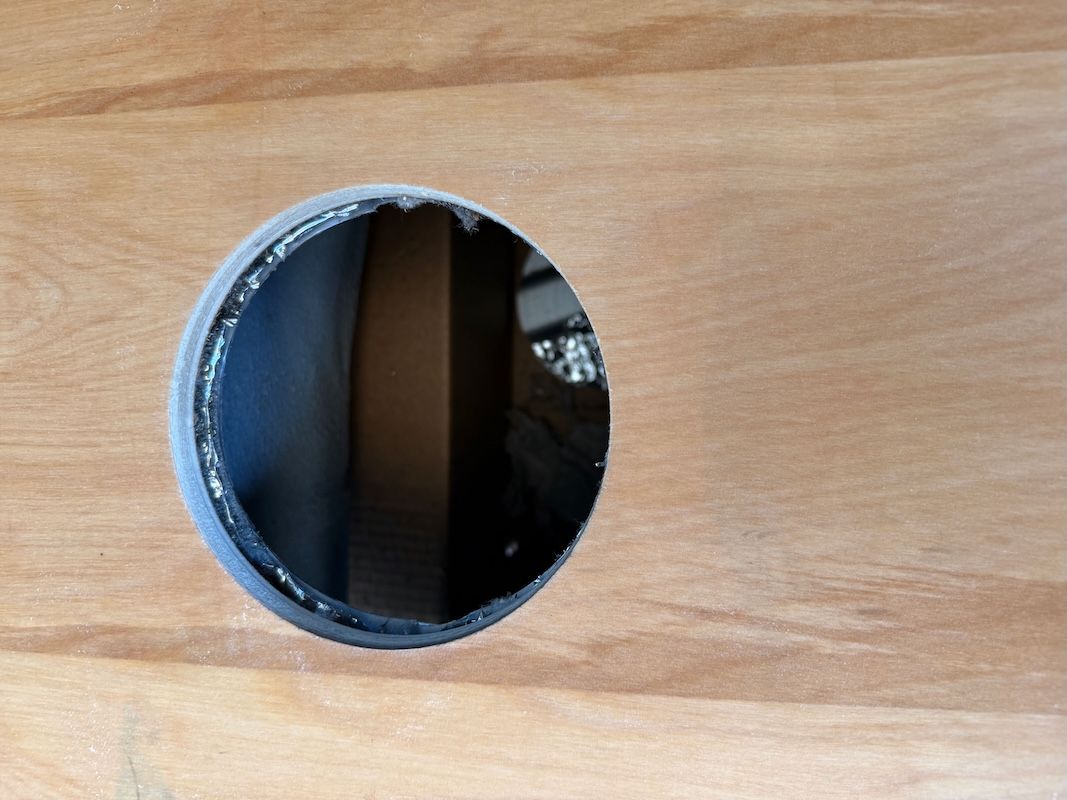
The first, and scariest part of the install, is to cut a hole in the floor of the van. Instead of using my jigsaw to cut a kinda of roundish hole. I opted for a 5" hole saw cutter.
It made it easy to determine the location of the hole, using it as guide to determine the location 0f the initial starter hole at the bottom of the van, and then using it to cut a perfect 5" hole from the top thought the 1/2" plywood underfloor, and the metal van floor. The turret plate fitted perfectly.
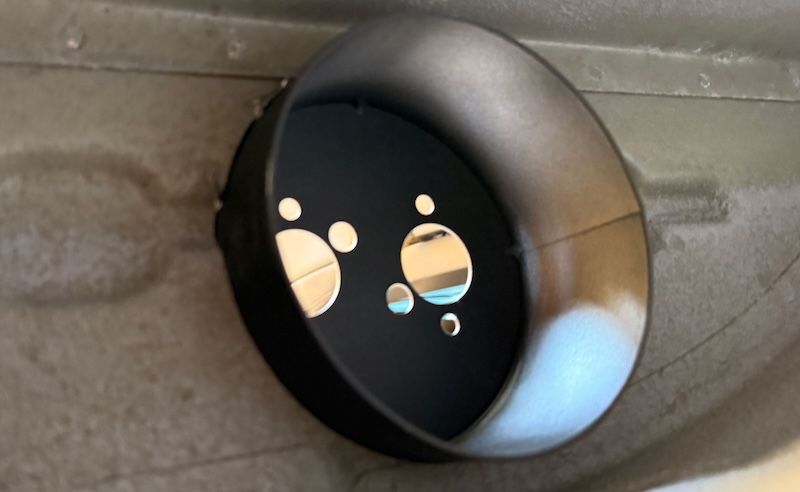
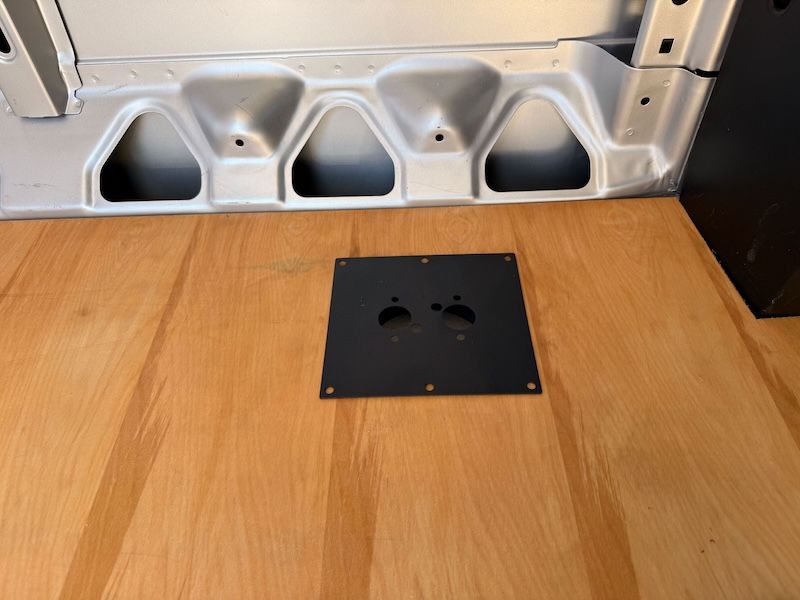
Heater turret mount plate
There are multiple options for installing the heater, under the chair, against a wall or on the floor. I decided to do a floor installation behind the driver seat.
We needed a platform there anyway, with our turnable seats requiring an elevated floor when turned towards the back of the van.
To make the install easier I bought a turret mount plate which the installation a breeze.

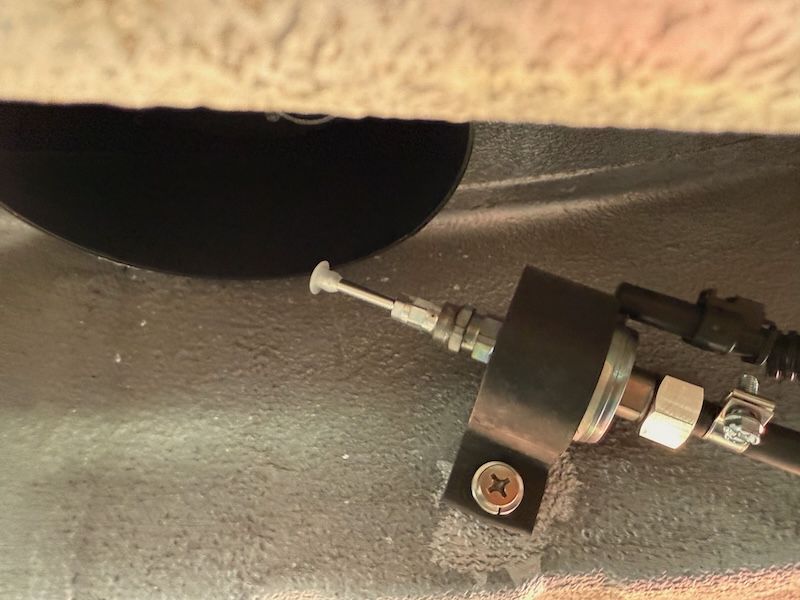
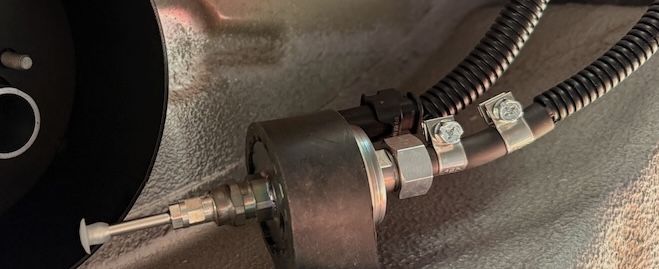
Install the fuel pump
The heater install kit comes with a fuel pump, which will pump the gas from the fuel tank into the heater. There are some specific requirements on its installation. It needs to be close to the heater and have an angle between 15 and 35 degrees pointing upwards towards the heater underneath the car. I drilled a hole in the chassis of the car and installed a 1/4" plusnut. I then screwed the supplied rubber mount onto the chassis.
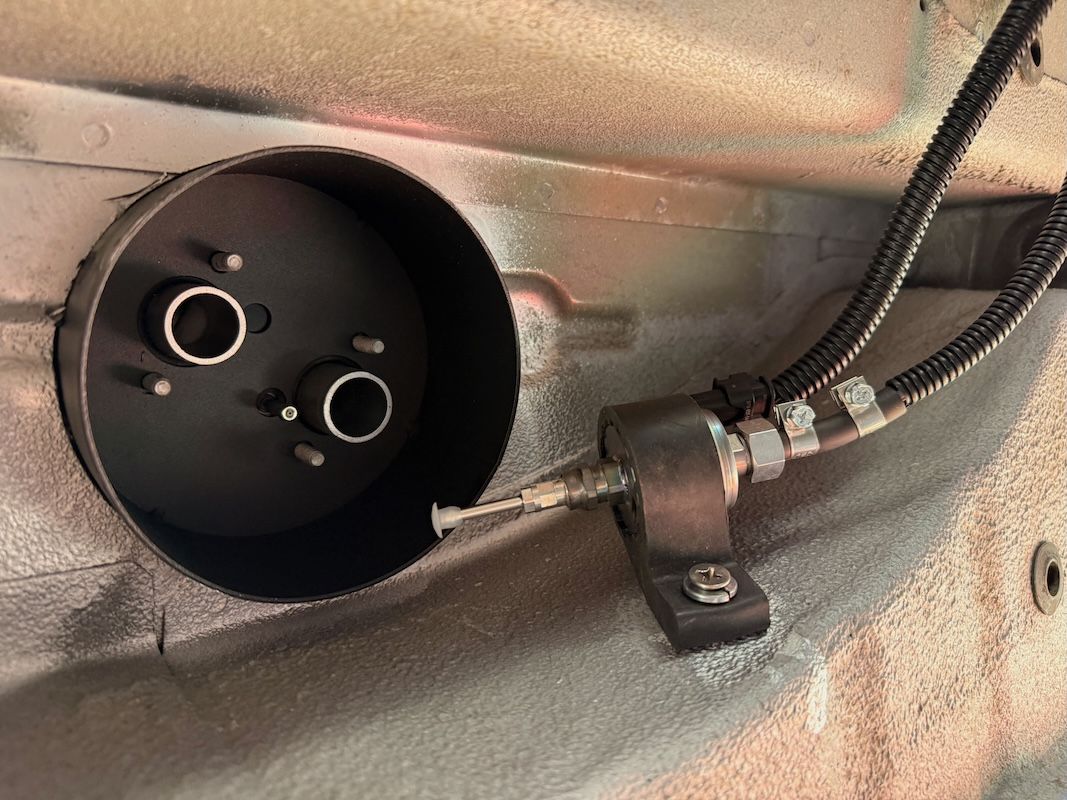
Connect the fuel line
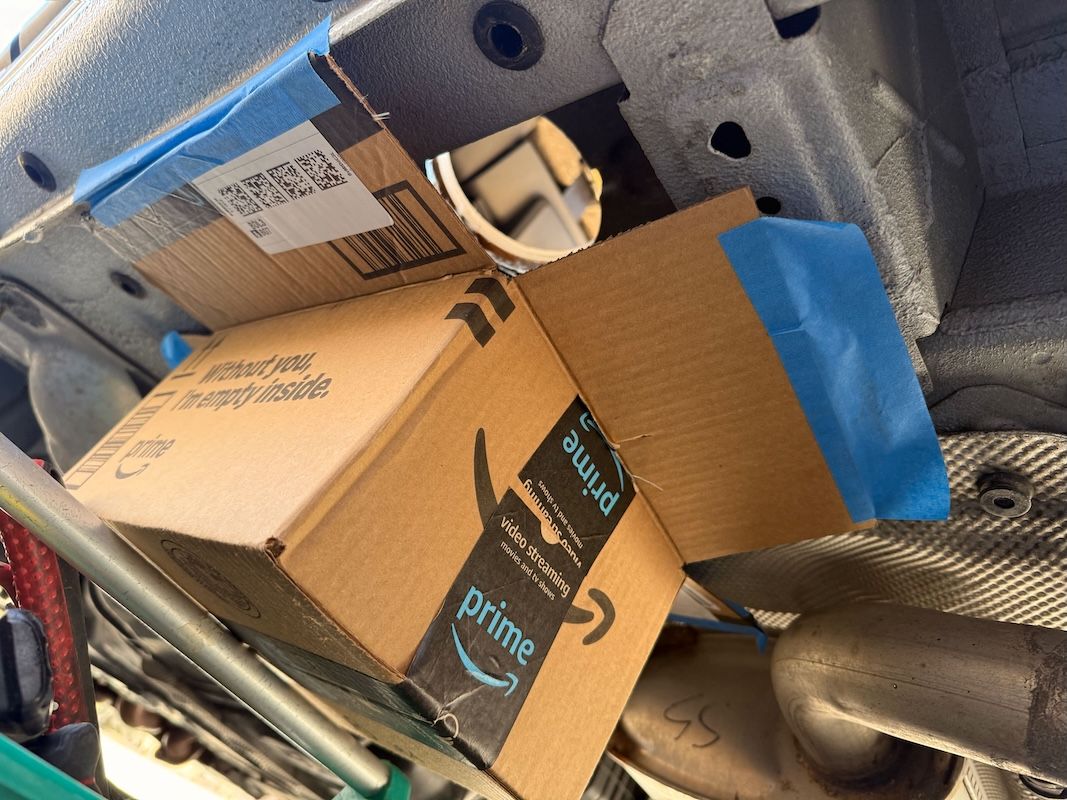
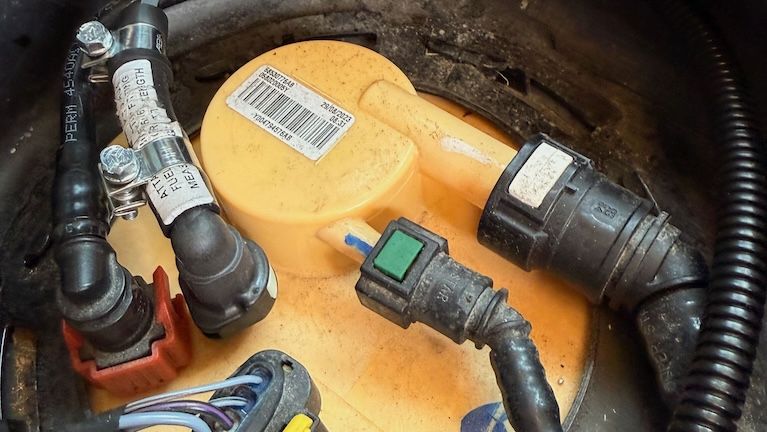
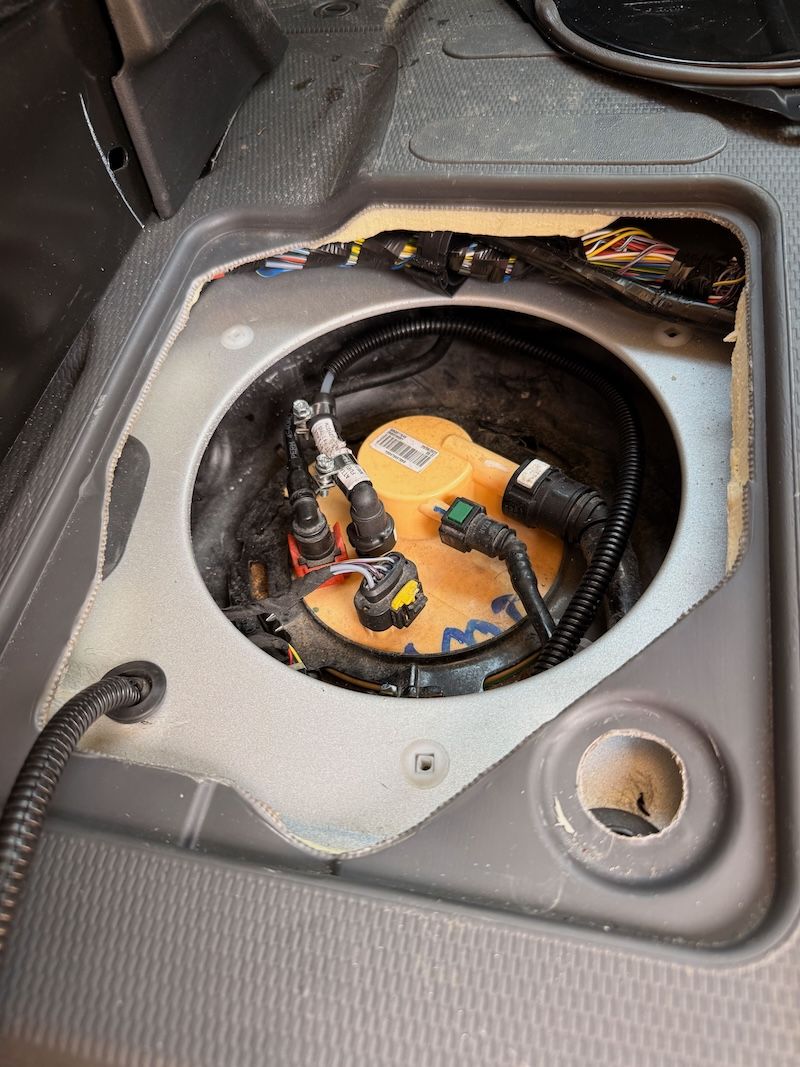
Once I installed the fuel pump, I routed the fuel line into the van. The Promaster has an auxiliary fuel outlet on the top of the gas tank. The auxiliary outlet is located underneath the floor between the 2 front seats. After opening the lid to access the auxiliary outlet, I found that some animal attempted to make nest there, which was also a sign there was access to the exterior.
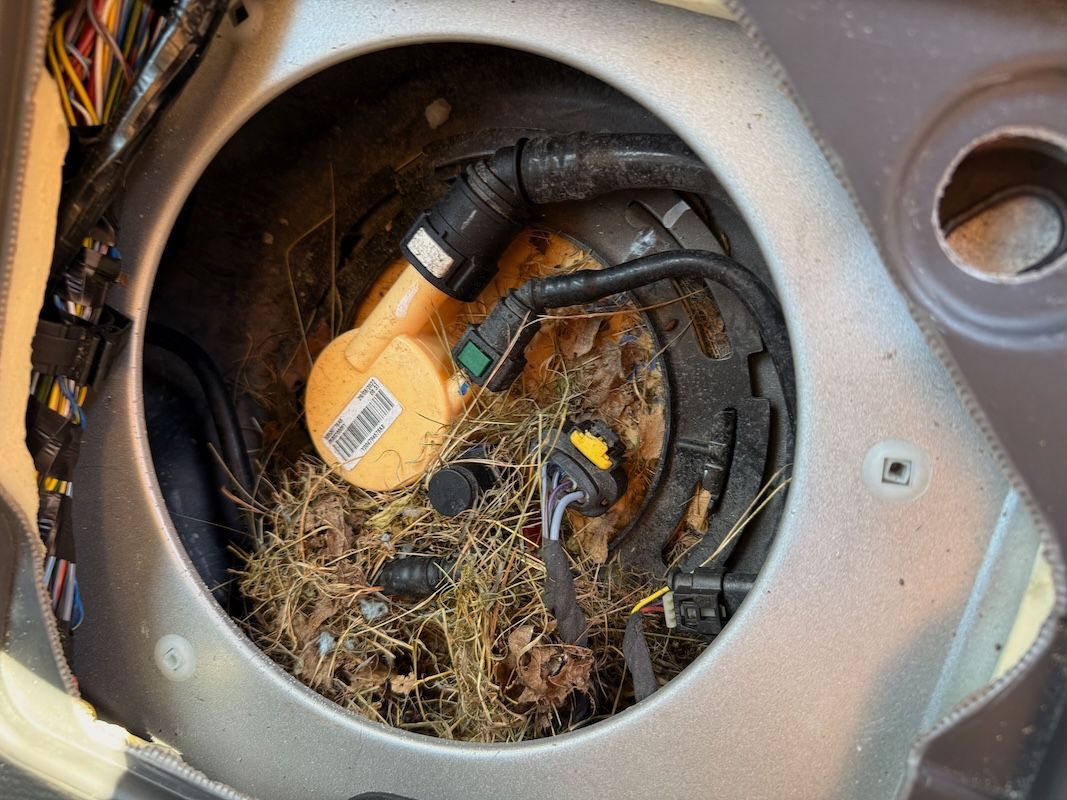
The access was behind the tank and I used it to run the fuel line to the pump. I bought a Dorman 5/16 fuel retaining clip that fits the fuel outlet perfectly. With the supplied clips and rubber connectors I connected the fuel line to the retaining clip.
I used the same clips and connectors to connet the fuel line to the pump, and the pump to the heater.

I had to look carefully which direction the pump was installed, as there are no markers to indicate the direction of the flow. The side of the pump where the electrical connection is, is where the fuel flows in. I had to slightly adjust this setup later, see the section where I address the "H0 No Fuel line" errors, discussed later.
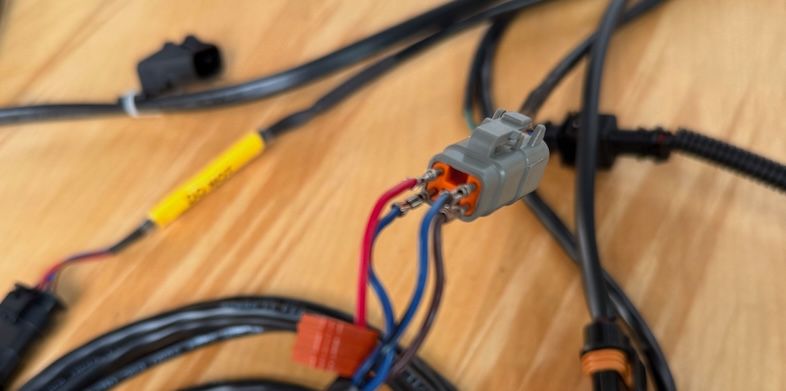
Electrical Harness explained
The next step is to connect the fuel pump power line. But before getting to that we need to discuss the super complicated looking electrical harness. A giant plug from which 5 different electrical cables emerge.
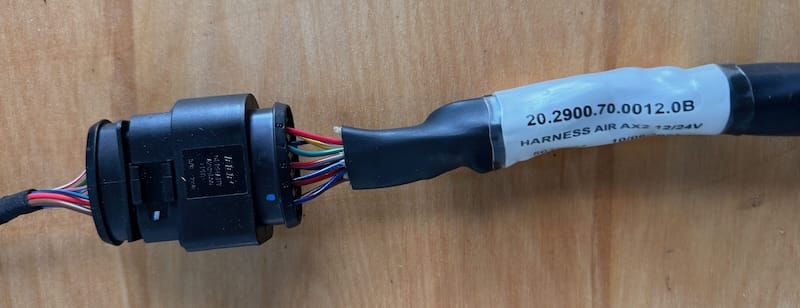
It looks pretty daunting but in the end is pretty straight forward. The various wire bundles extruding from the plug are as follows:
Battery cable - providing power from the battery to the heater system
Easy start connection cable - providing power to the control unit, as well as sending control commands to the heater.
Fuel pump cable - provides power to the fuel pump.
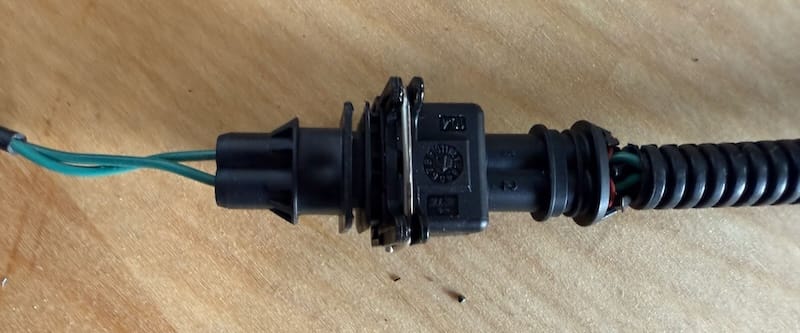
Altitude sensor - a self contained cable with an altitude sensor, it does not need to be connected to anything.
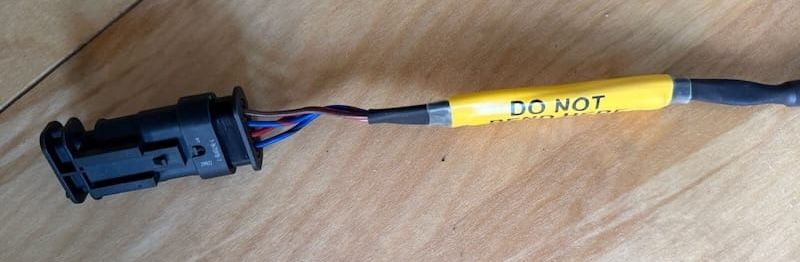
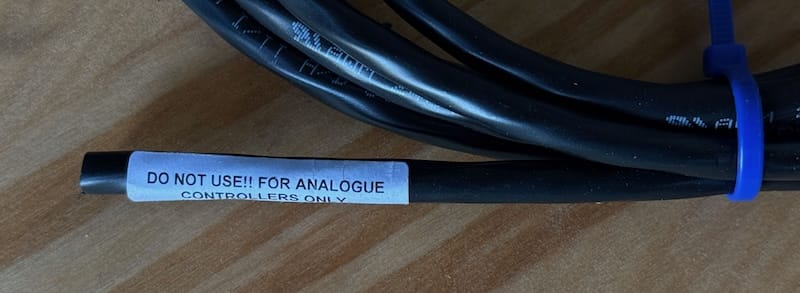
Analog control cable - not used when using the Easy start controller.
This harness plugs into the female plug of the heater.
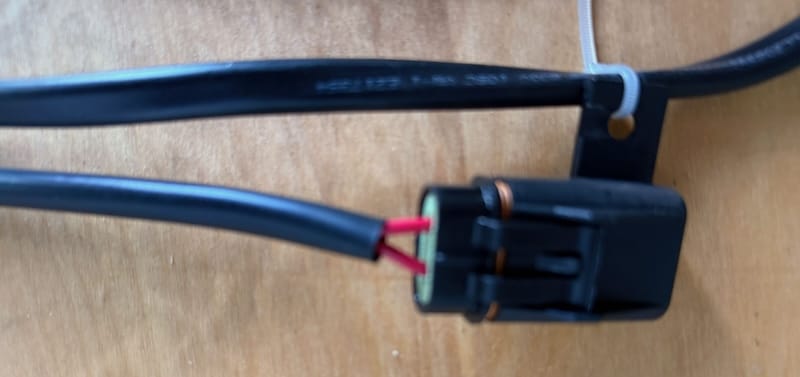
Install the fuel pump power line
When installing the fuel pump power line, I had to scratch my head a little on how I would run the fuel pump power line.
In the case of the Webasto Heater it is easy as it comes out the bottom of the heater, and therefor it was already outside the exterior of the van.
With the Eberspacher, it was a different story, after exploring multiple options, I opted for drilling a hole in the cap covering the auxiliary fuel outlet. I used a grommet to make it a safe and tight pass-through.

The supplied fuel pump power line (two green wires) had a plug on one end, but needed the installation of a plug on the other. I needed to crimp the provided pins on the and wires and then pushing them into the connector plug.
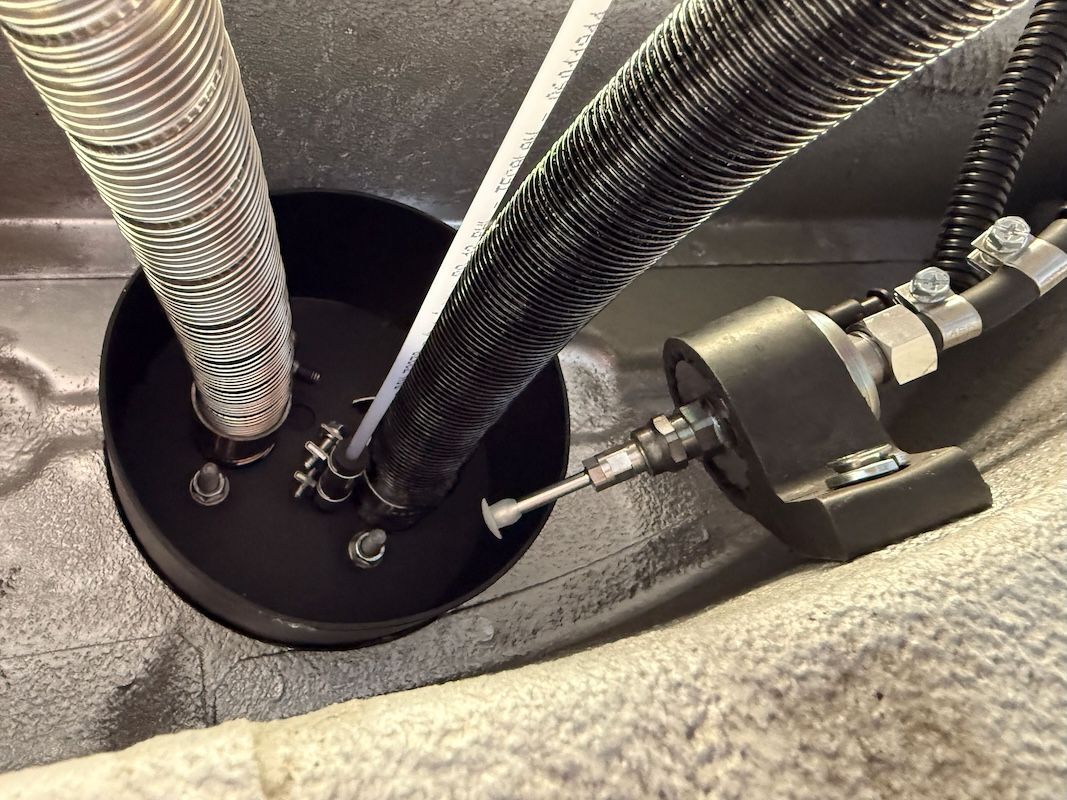
Mount the air intake, and exhaust pipes
After installing the fuel line I hooked up the air intake and the exhaust pipe. The Promaster has a number of pre-drilled holes on the underbody.
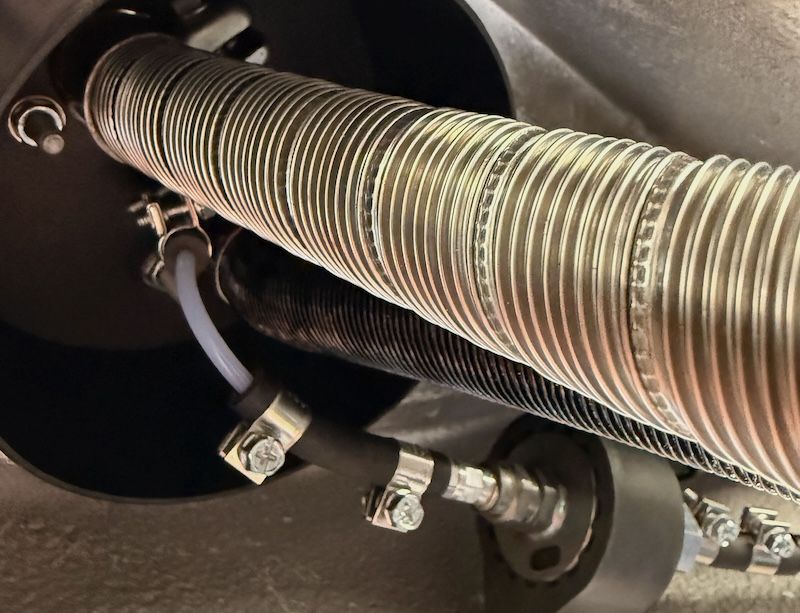
I used these and installed 1/4" rivnuts and with metal pipe strap attached the pipes to the underbody. The Eberspacher install kit comes with an exhaust muffler which install on the exhaust.
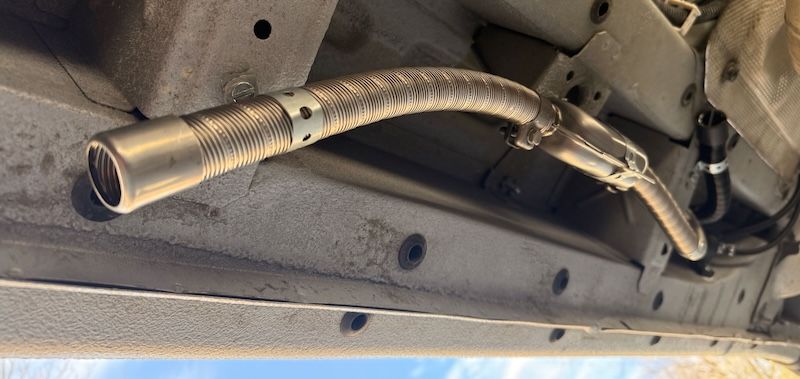
There are air intake mufflers(not part of the kit), and if the noise is too loud my install it later. I also made sure to keep the air intake facing backward and gave it enough space from the exhaust.
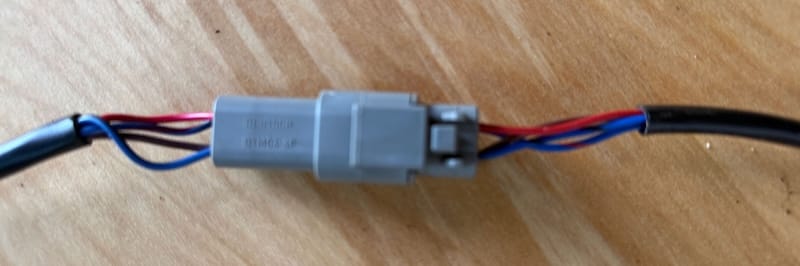
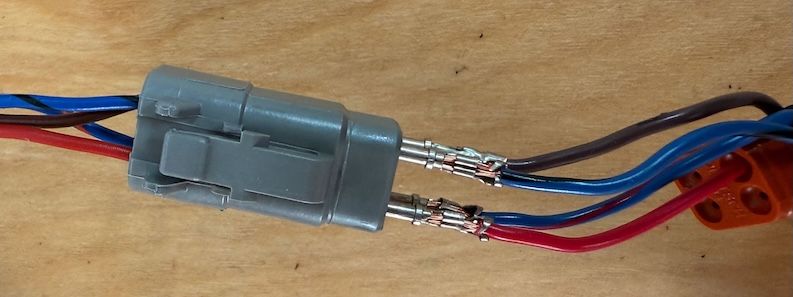
Connecting the Easy start controller
The easy controller has a short cable with 2 connectors, you can ignore one, but the connector with the 4 ports is the one to connect. The line from the harness does not have a connector on it yet. I guess to reason is to be able to route it through some tight spaces.
The connector to install comes with the kit and even though the manual was not clear on it, I made an assumption that to match the colors. The wires come in four colors: red, black, blue with red, and blue with black. Now getting the pins hooked up, and installed is the connector comes very precise as we will discuss in the No heater error paragraph.
Hooking up the Harness to the Battery
The last step to make the heater operational is to hook it up to a 12V battery. From the harness comes a long 2 wire line that connects to the battery.
Included in the kit is a breaker, which I didn't use as a had 12v breaker box, where I connected the harness power lines to. After connecting came the moment of truth, was the heater working. The easy controller display lit up... and displayed after a few seconds: "No heater". Well that was disappointing...
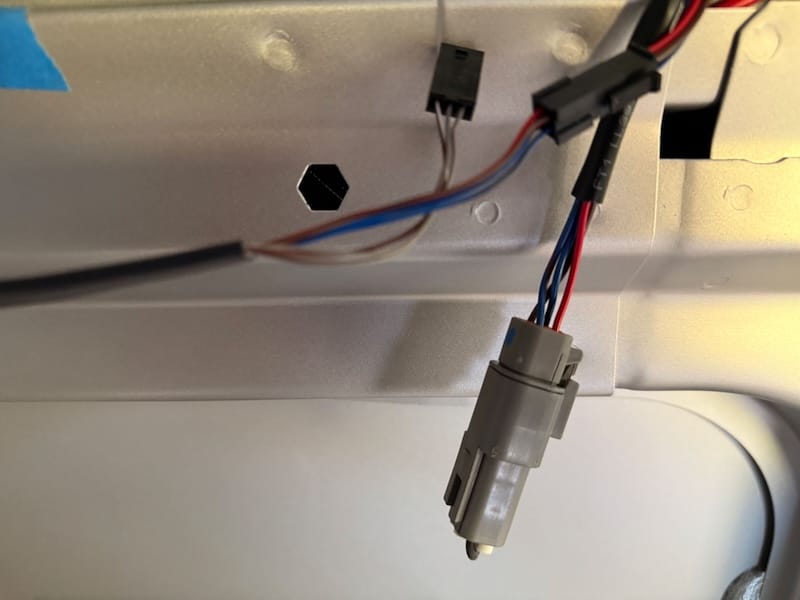
Solving the No Heater Error
I did some research and found that Eberspacher released a youtube video on how to debug the "No Heater" error. First you needed to check 2 pins on the harness adapter and verify there was a load, if that was the case you needed to check if there was a 60 ohm resistance on 2 other pins.
I had a some trouble verifying that with my voltage meter. So I went ahead tried their ultimate solution by swapping the blue/red and blue/black lines. When that did not solve the problem, I thought about plugging the pins (without the male adapter) directly into the female adapter.
Now the "No heater" error disappeared and I could control the heater. Basically I did not install the pins in the connector correctly, looking at the other connector, I saw how deep the pins needed to be inserted. Once I fixed that the connection worked.
Fix the H0 no fuel errors
The next problem was that despite the heater blower starting and the fuel pump engaging the heater did not generate heat. After a few minutes the heater blower would stop and the controller display would show and error "H0 no fuel". When checking the fuel line under the car it was clear there was no gas coming through the line.
Seemed the pump was not strong enough the pull the gas from the tank. So I disconnected the fuel line, and sucked until the gas came out and reconnected it. Now the heater engaged and generated heat. Yes!
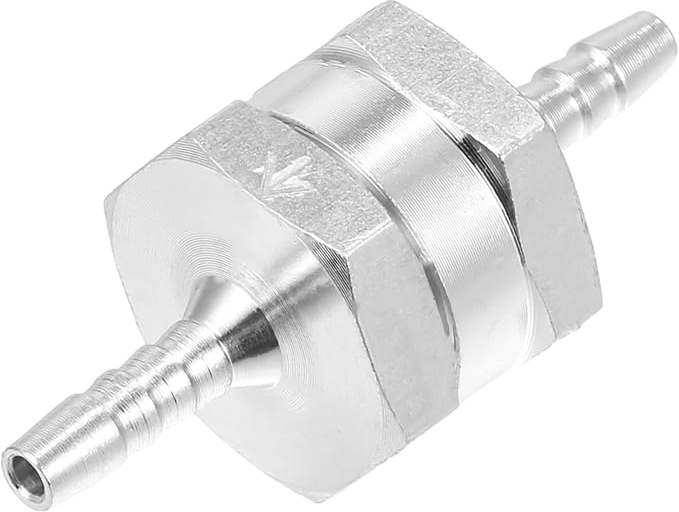
Unfortunately the next day, the same problem. The fuel got pulled back into the tank. After some research, I learned about a one-way fuel valve that I installed just before the fuel pump. This fixed the problem.
Fix the Service Error
When I installed the one-way valve I thought I could let the pump get the fuel, without sucking on the fuel line. I restarted the heater 3 times, and it kept coming back with the H0 No Fuel error. So I decided for the last time to suck the fuel into the line.
But when I started the heater again there was a Service required error. This error just would not go away, even disconnecting it from power for a whole night did not resolve the error. After some internet research, it turned out that after certain amount of errors the heater no longer starts working and requests to be serviced. Fortunately there is a way to clear the errors. The steps are:
- On the controller select Settings.
- Then long hold the top right back button
- The workshop menu appears.
- Use the arrow keys to navigate to error memory.
- You read them, and once done you can delete them.
- Then can to the control unit and do the same.
- Once all errors are cleared, the heater should (in my case) work again.
Conclusion
Overall I am happy with my install, the heater heats the car by 10 degrees within a half an hour and gets the chill out.
However I was a bit disappointed with the installation instructions. My Eberspacher heater install kit contained a few photocopied manual instructions. The installation comes with a CD-ROM, but who still has a CD ROM reader. The links to the website manuals are dead.
In the end I had to hunt down the installation instructions from a third-party. And even the manuals were not the clearest. In the end I made it work but it took much longer than I had expected. So hopefully by reading this post, the install will go smoother than in my case.
Affiliate Links for Products and Tools:
- Eberspacher Airtronic Heater Kit AS3 B2L (Gasoline) 12V
- Universal Stainless Steel Heater Turret Mount Plate
- Five Inch Hole Saw Cutter
- Dorman 800-123 Fuel Line Retaining Clip
- Fuel Line Check Valve
- Galvanized Metal Pipe Strap
As an Amazon Associate, Henry will receive a small commission from any qualifying purchases made through these links, at no additional cost to you. Thank you for your support!